A little forethought and organization will payoff in a great memorable adventure for your next outdoors excursion. There are some backpacking must haves that campers and back packers should really consider. When you go camping you will need a camping lantern , camping stove and a camping cot as well as a flash light.
Then you have the glorious Sunset and after that why not get together with your neighboring campers for a story telling session and sing-song round the campfire. If you thought a Camping Vacation would be ‘roughing it’ and ‘hard work’ then think again. Yes it will take some planning but that’s half the fun and it won’t be that much work. Most campsite have a fire pit with a steel grill to set the pots on. If there is a campfire ban in place you can use a portable barbecue. Take the utensils from the kitchen if you have bbq tools take them.
Be Ready for Severe Weather
Severe weather can occur anytime of year and often with little warning. According to NOAA, lightning is one of the most underrated severe weather hazards. It usually claims one or two victims at a time and does not cause mass destruction.
Horseback riding might be a fun and exciting option while visiting a national park. Several parks offer gravel roads for horseback riding, certain parks also have horse rentals and guided excursions available. A large van called an RV in employed by many campers, or more commonly in the UK a caravan is attached to a car. Both of these serve as basic mobile homes, with beds, gas and sometimes electricity.
So, if you haven’t experienced one of life treats, try it. You will enjoy yourself more than you might think. Go with the right people though.Had it with the “rat race”? Got time off but not much cash to spend? Losing touch with your family? Sounds like an old-fashioned camp out is just what you need.
Backpacking Must Haves
The cheap thrill from a backpacking adventure could really become one awesome experience. However, no one would like to encounter too unmanageable situations such as those of “Hostel”, that horrifying human trafficking movie, right?
No, there’s remedy for stupidity and overly trusting habits such as those boys in the movie. But a little common sense and carrying the right gear and other backpacking “must haves” should be of really great help if you would like to avoid any extreme conditions.So here are the perfect backpacking ingredients:
Lightweight Sleeping Mat
Maybe you’d say that it’s not your idea of a great adventure to take anything that resembles anything as cozy as your home. But after finding out just how many germs and bed bugs inhabit those local hotels and motels you’re planning to stay in, you will thank yourself so much for taking your own sleeping mat.
Portable Condiments
It really is a money-saving technique to keep your extra packets of mustard, ketchup, chili sauces and just about any condiment that fast food restaurants give when you order take out food or even when you dine-in. When you have not enough resources or when you forget to bring some of the ingredients that make your food more edible, these small packets of condiments can be handy. You don’t want shards of bottles cutting your skin or gooey ketchup messing up your other backpack stuff, right?
Whether you have a tight budget or believe sky’s the limit, you will find many camping supplies that range from as little as $20.00 all the way up to the hundreds.
Outdoor Activities
Camping mixed with outdoor activity is a great way to get ourselves involved with nature. National Parks can provide an excellent backdrop for some of your outdoor activities.Therefore in order to make sure that you have a pleasant camping adventure, make sure that you are fully clothed against all odds.
Place at least two in the bottom of you ice box then place the frozen meats, milk, juice into the box. You should place vegetables on top if there is room place a third frozen milk jug at the top of the box.
The next time you are planning on a great camping experience, don’t let the hassle of choosing a campsite get you down. Visit one of these great websites. With the thousands of campgrounds from which to choose, there is bound to be a place that is perfect for you and your family.
The thought of camping alone can be very intimidating, especially if you’re a woman. Ideally, it is not something recommended to women new to camping. If you are using a gas lantern in the rain you have to be careful because the glass globe can break if a lot of water gets on it. A single mantle in a lantern gives off about 300 watts of light.
Backpacking Must Haves
Both sports demand having the proper equipment and knowledge for safety reasons. Many National Parks offer established climbing routes that will have a wide range of difficulty levels; usually no permits are needed, unless an overnight stay in back country is involved. It is important to check weather conditions beforehand and use caution, never climb alone.
The point is to treat your family to an unforgettable outdoor adventure, so it doesn’t matter how you plan to camp or where you intend to go.
First comes first with a first aid kit.
No one can be too brave going anywhere he or she is not familiar with without taking a first aid kit. Unless you’re a cyborg, you will have to bring gauze, iodine solution, milk of magnesia, antibiotics, anti pyretics, and even mosquito repellent lotion.
Useful Get-ups
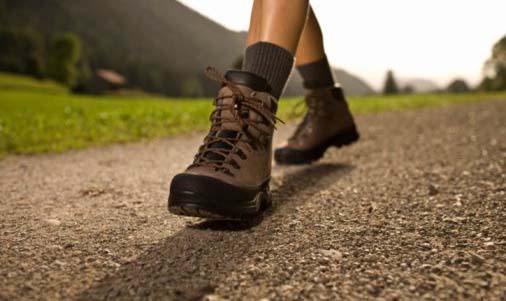
Dress for success! That should be the motto of any corporate slave. But for you, yours should be “Dress to Survive”, don’t you think so? Comfy clothes that won’t restrict your movements are the norm. If you go trekking, sturdy but comfy boots can be your best friend. A bandana can be very versatile, too. It can prevent sweat from blurring your vision and can also be a part of your first aid kit.
Backpack gizmos.
You’re not the king of the world. You will need a good compass and a reliable map. If you don’t how to use these, forget about your backpacking adventure.More backpacking “must-haves” such as a flashlight, a fire starter, and a Swiss knife are necessary too. But again, common sense should dictate to you what else you need to take. Stay safe!
If you’re bringing tins of beans, remember a manual can opener or pack your Swiss army knife. If you’re not sure what to bring, ask an associate at your local sporting store to help you choose your camping needs. Call on friends who like to camp, and ask them for advice.
Be Prepared
Apart from being submerged in wilderness, an important component of camping is the interaction with the localities, villagers and natives. These native guides know the unexplored places, the less traveled paths, the unknown facts, myths and stories about the locations.
Always be prepared for the weather when hiking. Carry a day pack with some water, a rain/wind jacket, a fleece/wool jacket or sweater, a first aid kit and some food. Good hiking boots are essential. On some of your hikes it is quite likely you will come across wildlife such as moose, black bears and grizzly bears, big horn sheep and deer.Many of the activities you might be interested in will be available in the towns near the parks. Various outfitters and companies outside some of the popular National Parks will offer excursions that go into the parks.
Plan on eating about as much while you’re camping as you eat when you’re at home. If you’re car camping and you have the extra space, it might not hurt to take a little extra food; but if you’re packing it in, every ounce counts, especially on long hikes. Be sure not to under pack your camping food – the only thing longer than a 20-miler is a 20-miler when you’re hungry. Starving your body while doing rigorous exercise, like hiking, could have adverse affects on your health.
Make Friends
With the hectic life many of us lead it would certainly be great to just “get away” from civilization and have fun in the wild outdoors. How many of us really know what to do when we get there or what to take with us in the “survival pack”? Camping can be a really refreshing lift to life, but roughing it may not come without some sort of price. Adequate preparation is a must and may prevent your trip into the wilds from becoming a disaster.
As I rounded a bend blasted through granite, just wide enough to accommodate a horse-drawn wagon, I braked suddenly and gasped.Make your van into something that’s usable for you, especially if it’s going to be your residence for days or weeks at a time.
Instead of going up to other campers and saying, “Hi, I’m Kerry and I’m here by myself” ask questions like “How can I contact you if I experience a problem” or “is this campground regularly patrolled?”Don’t advertise you are by yourself by finding campsites away from walking trails


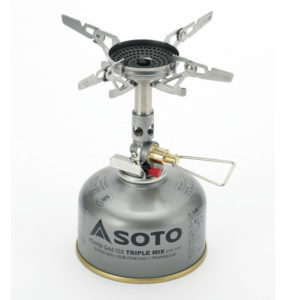 Backpacking stoves have continued to get smaller, lighter, and easier to use. With advances in stove design, improvements in pre-prepared backpacking food, more people are choosing a backpacking stove. This has resulted in more choices for consumers, who are often uncertain about what advantages different types of stoves offer.
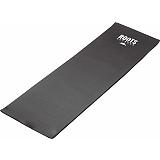 Ultralight backpackers want to give up weight, not comfort. Sleeping Pads For Lightweight Backpacking are pretty much a necessity for backpacking comfort, but who wants to carry those monstrous old inflatables down the trail? Try some of these lightweight options instead.
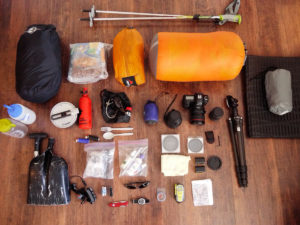 Siena is located an hour or so outside of Florence, Italy. My handy dandy guidebook suggested it was a side trip that just had to be made. Backpacking In Siena can be an interesting side trip. A medieval structure located behind protective walls on the top of a hill. The central area was generally closed off to cars and it was a taste of true Italy. Who was I to argue?
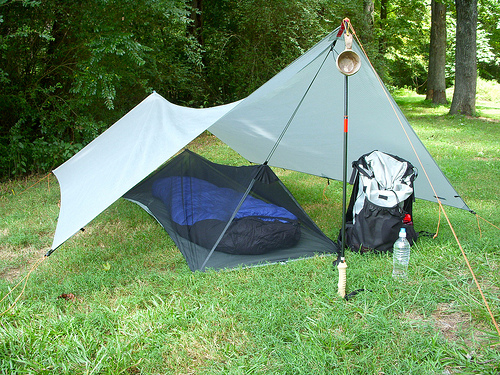
 Why use tarp shelters? The biggest reason ultralight backpackers use them is to reduce pack weight. The lightest tent you can find will be close to three pounds. Some of the newest ultralight tarps weigh just seven ounces. That’s why tarp shelters for lightweight backpackers are so popular. Read on for more about how to use tarp shelters.
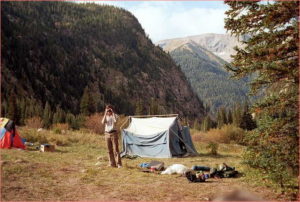 Wilderness trips can be dangerous, but you can make then less so. The following ten essentials for backpacking trips can make a huge difference on your trips success.
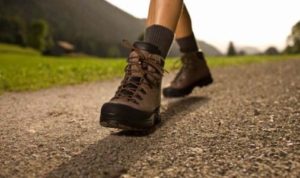 More and more people today enjoy the simple, wholesome fun of hiking. Hiking is an affordable, yet healthy and emotionally rewarding way to spend a vacation or a long weekend. And you don’t need to visit a travel agent. We have put together a few Hiking Gear Packing Tips for readers to help them enjoy their vacation.
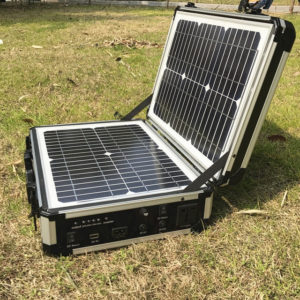 There are lots of issues to think about when considering portable solar power systems. Some of the items are features include the following. How much does it weigh? If you will be carrying your equipment in a car, this may not be so much of an issue. But if you’re backpacking, it is! How much power does it supply? How long does it take to charge my equipment? Can it run my equipment, or only charge it?